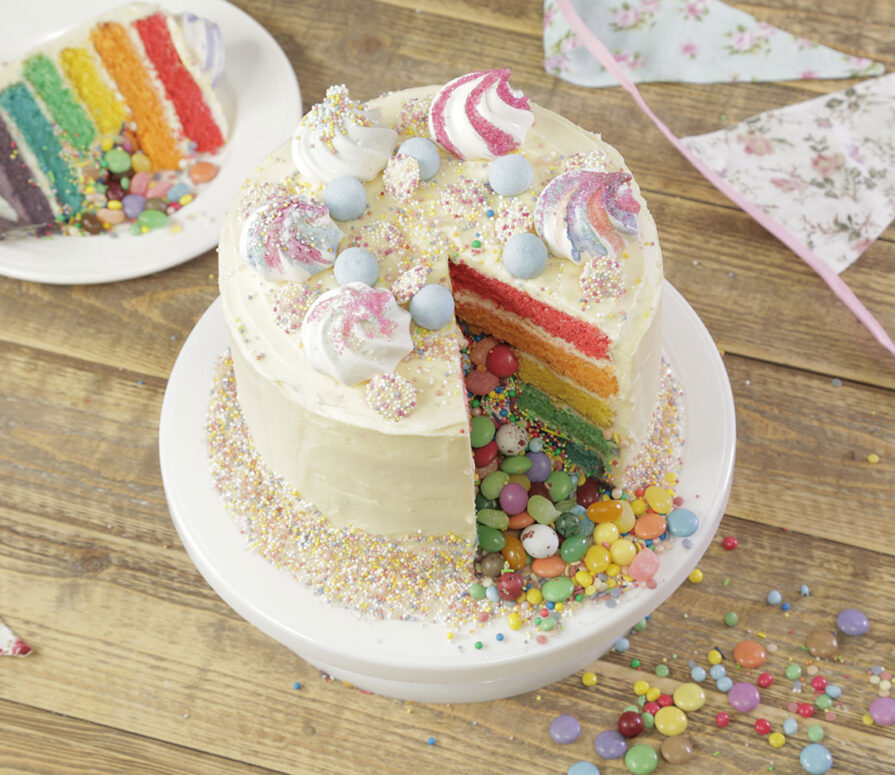
- For the cake layers:
- 500g Self raising flour
- 500g Sugar
- 500g Butter (softened, at room temperature)
- 8 eggs
- 100ml Milk
- 1 Tsp Vanilla extract
- 6 Different food colours/gels
- For the buttercream:
- 500g of Butter (softened, at room temperature)
- 800g of Icing sugar
- 2 Tbsp of milk or cream
- 2 Tsp of vanilla extract
- For the filling & topping:
- A variety of sweets, sprinkles, sugar coated chocolates
STEP 1
Cake layers:
STEP 2
Prepare your cake pans. Line 2 to 3 round cake pans with paper rounds and coat and grease with butter. Arrange a rack in the middle of the oven and heat to 180°C/fan 160°C/gas mark 4.
STEP 3
Cream the butter and sugar. Place the butter and sugar in stand mixer fitted with a paddle attachment and beat on medium speed until the mixture is lightened in colour and slightly increased in volume, about 5 minutes.
STEP 4
Add the egg yolks. Stop and scrape down the sides of the mixer with a rubber spatula. Return the mixer to low speed and add the egg yolks one at a time, allowing each to fully incorporate into the batter before adding the next.
STEP 5
Add the Flour. Stop and scrape down the sides of the mixer with a rubber spatula. Return the mixer to low speed and add the flour a bit at a time.
STEP 6
Add the vanilla and milk.
STEP 7
Mix for 3 minutes on medium speed. Stop the mixer and give the whole bowl another good scrape. Get down to the bottom of the bowl where butter and sugar tend to hide and will make your cakes colour and bake unevenly. Return the mixer to medium speed and b
STEP 8
Divide and colour the batter. You’ll be baking 2 or 3 cakes at a time, depending on the number of cake pans you have. Weigh and divide the batter equally between 6 bowls.
STEP 9
Add 1 teaspoon of gel food colouring and mix well. Pour the coloured batter into a prepared cake pan. Repeat with your other colours.
STEP 10
Bake the 2 to 3 coloured cakes you have prepared for around 15-20 minutes until they are set and spring back when touched.
STEP 11
Remove the cakes and put on a cooling rack and cool. Remove the cakes from the pans, wrap each still slightly-warm cake separately in cling film whilst you continue with your other layers.
STEP 12
Repeat dividing the batter, colouring it, and baking. Cool and wrap the remaining cakes. Set aside at room temperature.
STEP 13
Assembly:
STEP 14
Beat the butter in the bowl of a stand mixer fitted with a paddle attachment on medium speed until smooth.
STEP 15
Turn the mixer speed to low and slowly add in the sugar. Once it’s all added in, increase the speed to medium-low and mix until thoroughly combined.
STEP 16
Reduce the mixer to low, add in the cream or milk and vanilla, and mix until combined.
STEP 17
Mix on medium speed until smooth and creamy.
STEP 18
Decide what order you wish to have your cake layers, the middle two layers are the ones that will need to have a hole for the sweet fillings. You may wish to level your cake layers if they are too tall or uneven.
STEP 19
Take your chosen two middle layers and press a hole in the centre of the cake with the cookie cutter.
STEP 20
Put a blob of buttercream in the centre of a cake stand. Put your first cake layer central on the stand. Top with some buttercream and spread until level. Place your second cake layer on top of the first as central as possible. Again, top with some butt
STEP 21
Pour the sweets into the hole, and fill until level with the top cake layer.
STEP 22
Place the 5th layer on top of the cake, topping with an even level of buttercream. Place the final layer on top of the cake and crumb coat the whole of the cake with a thin layer of buttercream.
STEP 23
Chill the cake in the fridge for at least an hour.
STEP 24
Decorate:
STEP 25
Cover the whole cake with the remaining buttercream until you have your desired smoothness. Decorate however you wish, meringue kisses make for a wonderful topper, as well as sprinkles and your favourite colourful sweets.
Products used to make this recipe

Swan Retro Scale
Measure a whole variety of ingredients for baking and cooking with the Swan Retro Mechanical Scale. With an 8kg capacity there is plenty of space to weigh even a large…
View Product
Swan 800W Retro Stand Mixer
If you love baking, you'll love the Swan Retro 800W stand mixer. Featuring a powerful 800W power output, 8 variable speeds and pulse function, and a simple rotary switch control…
View Product
Submit a review